Friday, October 12, 2012

Moules (mussels) a la Mariniere


For comments, please post below or email to cookingwithlarue@gmail.com

Moules (mussels) a la Mariniere

Serves: 2
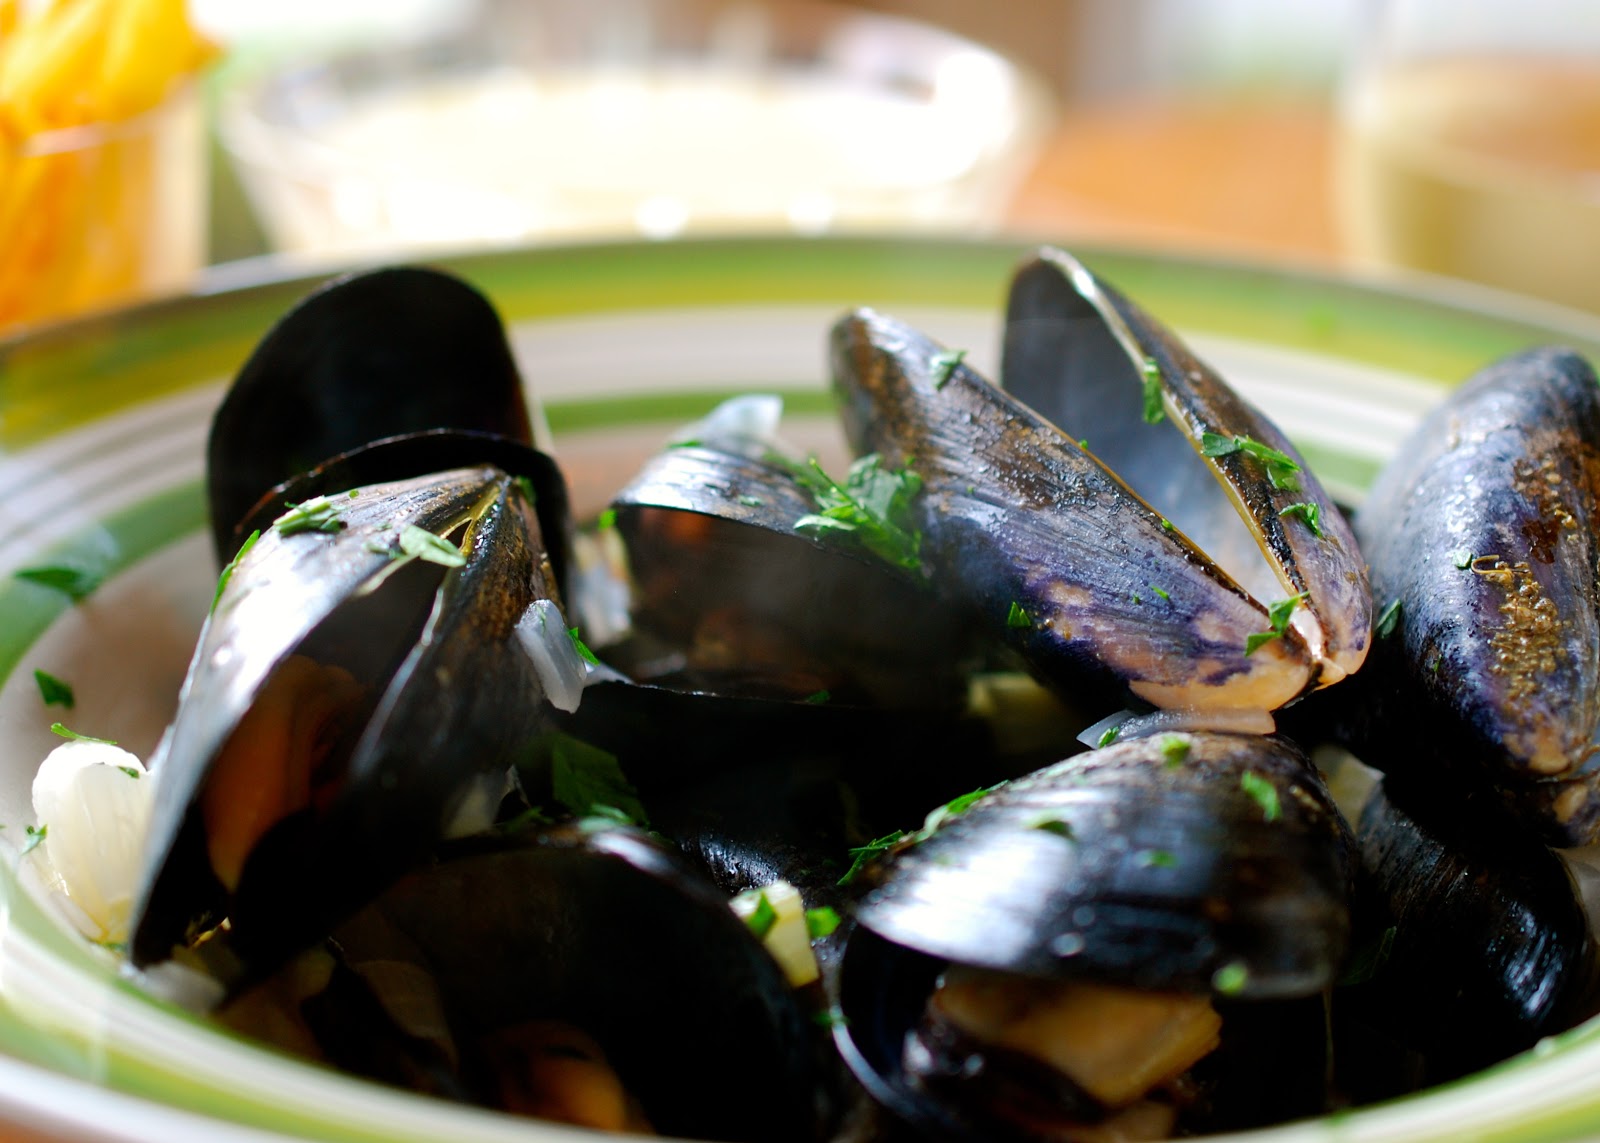
Moules a la Mariniere
San Diego is finally on their way to getting a Public Market (http://sandiegopublicmarket.com). You know, like in Seattle’s Pikes Place Market, San Francisco’s Ferry Building or London’s Borough Market. It is wonder it has taken this long to get started given our nearly year-round growing season, abundance of active farms and farmers and vibrant food scene. The grand opening occurred recently – Gary and I were there to check it out. I was thrilled to be interviewed by KPBS – see a clip here: http://www.kpbs.org/news/2012/sep/21/san-diego-public-market- - for which I am grateful for the additional exposure to my cooking blog!

While shopping we came across a local vendor of sustainable shellfish from nearby Carlsbad. Check out Carlsbad Aquafarm (http://carlsbadaquafarm.com). You can find them in many nearby farmer markets as well as Whole Foods & Sprouts. Other sustainable shellfish farms can likely be found in your area…just ask around or do a search on the Internet. Gary challenged me to feature mussels on my blog and “make something interesting”. So what is interesting?  I really wanted to be able to taste the mussels and not camouflage the flavor so opted for a classic mussel recipe – and served it with frites – of course!

In France and Belgium, steamed mussels and crisp fries go together as naturally as fish and chips in England, and burgers and fries in the States. The combination is one of the world’s best comfort foods pairings; the juicy, sweet, slightly briny mussels playing off the earthiness of the fries, with an occasional dip of the fries into mayonnaise providing an added note of richness. This classic recipe calls for steaming the mussels in white wine, which lends acidity and creates a flavorful sauce.

Mussels, with their long, oval, blue-black shells and delicious pink-orange flesh are often called the poor man’s oyster. Before they can be cooked, mussels must have a rather long and careful cleaning process to remove all possible sand from their interiors, and to rid the shells of any slime and dirt, which might spoil the excellent juices they render as they steam open. Discard any mussels that are not firmly closed, or which feel lighter in weight than the rest. Discard also any too-heavy mussels, as they may be nothing but sand enclosed between two mussel shells.

Scrub each mussel very clean with a rough brush under running water. Then with pliers or a small knife, scrape off the tuft of hairs, or beard, which protrudes from between one side of the closed shell halves. Set the mussels in a basin or bucket of fresh water for an hour or two so they will disgorge their sand and also lose a bit of their saltiness. I like to add flour to the soaking water on the theory that while the mussels eat the flour and become fatter and more succulent, they are at the same time disgorging their sand more thoroughly. Use 1/3 cup of flour for each 2 quarts of water, beating the flour and a bit of water with a whip first, to mix it thoroughly. Then, after soaking the mussels, lift them into a colander, and rinse them in cold water and they are ready to cook. This should be done shortly before the planned cooking time.
Swimming in flour water

Time for a trim!

As the mussels take very little time to cook, it is prudent to have ready any accompaniments. I served our mussels with freshly baked fries and mayonnaise to which I added a single smashed garlic clove, 1 tsp lemon juice, salt and pepper to boost the flavor.
  • 2 ½ lb mussels, debearded and scrubbed as above
  • ¾ C dry white wine
  • 2 Tb unsalted butter, cubed
  • 3 ribs celery, finely chopped
  • 1½ leeks, light green and white parts, cut into ¼”-thick slices
  • ½ large yellow onion, finely chopped
  • 2 Tb parsley – optional garnish

Heat a 12-inch, high-sided skillet over high heat.  Add 2½ lb cleaned mussels, ¾ C dry white wine, 2 Tb butter, 3 chopped celery ribs, 1½ sliced leeks and ½ chopped onion; season with salt and pepper, and cover skillet.  Cook, occasionally shaking skillet, until all mussels have opened, about 5 minutes. Before serving, toss any mussels that have not opened.

Then the mussels, shells and all, are dipped out into soup plates, and the cooking liquor is poured over them. Sprinkle with some chopped parsley as garnish. Each lucky recipient removes mussels one by one from their shells with fingers or a fork and discards the shells into a side dish. In addition, provide a soup spoon for drinking up the mussel juices, a big napkin and a finger bowl. Along with the mussels serve your freshly baked fries with the doctored mayonnaise for dipping of the fries.

Mussels are best served with Champagne (of course!) or a chilled light dry white wine such as Muscadet, dry Graves, or one of the Pouillys. This is such an simple and elegant meal, I do not know why it has not become a weekly one!

Bon Appetit

Larue

Thursday, October 4, 2012

Grits Cakes

Grits Cakes
Grits cakes 
For some, the word grits is an all too descriptive name for a dish whose main feature might be unfavorably remembered as coarsely ground pieces of dried corn moistened into a mealy paste.

Not much more gastronomical romance is added by the theory that the name comes from grist, as in grist mill, or from grytte -- a Middle English word meaning coarse, or coarsely ground. But among those in the know, grits are a notable ingredient in America's culinary melting pot. Corn grits include the hull and the germ of the grain. To make hominy, you start with field corn. Soaking the dried corn kernels in a solution of baking soda, lime or wood ash for a day or two produces the traditional hominy grits.  The kernel’s shell pops off, and the kernel swells to twice its size. Kernels are rinsed numerous times, then dried, and finely ground into grits. The grind can be coarse, medium or fine. Of interest, this same process is used to make masa harina, the key ingredient in corn tortillas. The alkaline soaking treatment of corn also enhances its nutritional value for many cultures. Due to the altered chemistry of the corn, grits and tortillas both prevent pellagra, a niacin deficiency disease. It’s also this alkaline treatment that makes grits different from polenta. Stick with me on this one – you are in for a new culinary treat, which should not be just enjoyed by our Southern friends.

I use coarse grind white grits for this recipe. It was a challenge to find white coarse grits in southern California on short notice. Likely the best source is Anson Mills but with my dinner party but days away and a personal commitment to introduce them to grits I had to search for other options nearby or pay overnight shipping. Cornmeal and polenta are not the same, despite what many grocers advised. I did some internet searching and found many blog comments referencing the wonderfulness of Trader Joe’s White Coarse Grits. Bingo!  Look for it in the cereal section – go figure. But there they were. I bought 4 bags in fear they would not be there on a return visit and went out of my way to personally thank the manager for having them in stock. Nothing like reinforcement to get continued good stocking!
Found 'em at Trader Joe's

Grits!
On a previous post – I shared a wonderful recipe for crispy polenta, (March 7, 2012), which is an easy and satisfying dish. Grits cakes are similar only I used cream cheese to end with a crispy outside and creamy in the middle. This would work as an appetizer cut into finger-sized portions with a dollop of tomato marmalade on top, or as side dish or vegetarian entrée.
  • 1 large garlic clove
  • 3½ C Chicken or Vegetable stock
  • 2 C coarse stone-ground white grits
  • 8 Tb unsalted butter, cut into 8 pieces, at room temperature
  • 4 oz cream cheese at room temperature
  • Kosher salt & Freshly ground black pepper
  • ½ C all-purpose flour
  • 3 large eggs
  • 1½ C finely ground panko crumbs
  • 2 Tb coarsely chopped Italian parsley
  • Canola oil
  • Parchment paper 

Line a 9 x 13-inch baking pan with parchment paper. Cut a second piece the same size and set aside.

Finely chop 1 large garlic clove, sprinkle it with about ¼ tsp coarse kosher salt and work it into a paste, chopping and scraping the garlic with the side of your chef’s knife. Combine the garlic paste and 3½ C chicken or vegetable stock in a medium saucepan, season with additional salt, and bring to a boil. Reduce heat to medium-low and slowly whisk in 2 C coarse stone-ground white grits. Reduce the heat to low and cook, stirring occasionally to keep the grits from sticking to the bottom of the pan, for 25-30 minutes, or until all the stock has been absorbed and the grits are tender with just slight resistance. When a spoon is dragged through the grits, the bottom of the pan should remain visible.
stock absorbed, grits tender...see, you can see the bottom of the pan with one swipe of spatula
Immediately stir in 8 Tb butter, one piece at a time, stirring until it is absorbed, then stir in 4 oz cream cheese until well combined and smooth. Season to taste with salt and pepper. Spread the grits evenly in the prepared pan with parchment paper. Cover with second sheet of parchment paper. With your hands, smooth and compress the layer of grits. Top with a second baking sheet, weight with cans for foil wrapped bricks, and refrigerate for at least 4 hours, until firm, or overnight.
After compressing
 Remove the top pan and parchment from the grits. Run a knife around the edges of the pan to loosen them and invert pan onto a cutting board. Peel off the parchment paper. Cut the grits into 12 or more equal pieces.

Spread ½ C flour in a shallow bowl. Beat 3 large eggs in a shallow bowl and season with salt and pepper. Combine 1½ C finely ground panko crumbs and 2 Tb chopped parsley in third shallow bowl.
Ready for dipping!
Dip each cut grit cake into flour, turning to coat and patting off excess, then dip in eggs, letting excess drip off, and coat well in panko crumb mixture. Set on a baking sheet. Pour ¼-inch of canola oil into a large nonstick frying pan and heat over medium heat until oil just begins to shimmer. Carefully add as many cakes as will fit in the pan comfortably and cook until golden on the front side, 1-2 minutes. Flip and cook until golden on the second side, 1-2 minutes. If eating soon, transfer to a rack over a baking sheet and keep warm in the oven until ready to serve. Or they can be fried a few hours a head, kept at room temp or refrigerated – and reheated later. It is best that they be fried on the day of serving. Fry remaining cakes, adding more oil as needed. It at any point there are burnt panko crumbs in the oil, discard the oil and replace with fresh oil before continuing.

After dipping the grits
....and after cooking
These can be served as an appetizer, perhaps on a bed of tomato sauce, and/or a dollop of tomato sauce on top. Or, it can be served as a side dish. I have done both – most recently as a side to Miso Marinate Fish with Beurre Blanc. (Posted June 26, 2013) – it was amazing! It is also a great vegetarian entrée with some green vegetables or salad.
Another grits presentation
 There are many wines that would pair well with this dish- both whites and reds. If serving as an appetizer, champagne would be perfect – or a buttery California Chardonnay. If a side dish, pair the wine to the entrée as very few wines would not pair well with this versatile dish.

We love it. Give grits a try and you will too!
Larue

Adapted from “Ad Hoc at Home” by Thomas Keller

Monday, September 24, 2012

Israeli Couscous with Roasted Butternut Squash and Preserved Lemon

For comments, please post below or email to cookingwithlarue@gmail.com

Israeli Couscous with Roasted Butternut Squash and Preserved Lemon

I first made this recipe in New Orleans while visiting my vegetarian daughter. I often cook when visiting and freeze the food for her later use. She is a busy medicine resident and never seems to have time to cook from scratch. I thought this would freeze well – and it has. Of course, I too had to sample – the flavor was amazing!! There is a reason that squash is called butternut! The flavor is nutty, sweet and moist.

Israeli couscous can be found in health food stores and many traditional grocers. Called pearl couscous or Ptitim in Israel, they are small round pasta-like granules made from semolina and wheat flour. Unlike the familiar small, yellow semolina-based North African couscous, Israeli couscous is twice as big and is toasted rather than dried. This provides a nutty flavor and sturdy composition that makes it a bit chewy bit and allows it to stand  up well to this preparation. One possible substitute would be acini di pepe pasta.
Israeli couscous
Preserved lemons can be found readily made in Mediterranean section of grocers or online.  However, it is very easy to make your own (see recipe at the end) but you would need to plan well in advance as it takes several weeks to a month “to cure”.  I always have a jar on hand in the refrigerator – it keeps for at least one year – and can be used in any recipe that calls for both lemons and salt.

  • 3-pound butternut squash
  • 1½ preserved lemon (recipe for making preserved lemons below)
  • 5 Tb extra-virgin olive oil
  • 1 large onion, chopped
  • 3 Tb butter
  • ¾ C pine nuts
  • 1¾ C Israeli couscous (about 1 lb.)
  • 1 3-inch cinnamon stick
  • 1 bay leaf
  • 2 C vegetable or chicken broth
  • ¾ C chopped parsley
  • ½ C golden raisins
  • ¼ tsp ground cinnamon
  • Salt and Freshly ground pepper
  • ¼ C dried cherries or cranberries - optional
Preheat your oven to 475 degree F. Begin with a 3-pound butternut squash – select one that is rock solid and heavy for size. Although traditionally a winter squash, it is readily available year round. Look for the large pear shaped squash with a matte skin – a shiny one is a sign that the squash was picked prematurely. It can be stored in a cool, dry place (not a refrigerator) for a month making it useful to have on hand for impromptu meals. 
If you dont' want to buy the squash, you can always grow it! From our garden....
Split it lengthwise and remove the seeds. Simply scraping them out with the edge of a spoon most easily does this. Peel squash and cut into ¼ - ½ inch dice – they should be uniform in size in order to assure they roast uniformly.
Scooping out the seeds of the squash

Diced butternut squash
Toss squash with 1 Tb olive oil and salt in a large shallow baking pan/sheet. Spread out into one layer. Roast in upper third of oven for 15 minutes or until squash is tender. Transfer to a large bowl.
Cooking the diced squash
 Quarter 1½ preserved lemons, rinse thoroughly to remove excess salt, remove flesh, reserving only peel. Dry thoroughly and finely chop. Set aside.
Chopped perserved lemons
 Cook 1 chopped large onion in 1 Tb olive oil in a heavy skillet over medium high heat, stirring occasionally, until just beginning to turn golden. Add to bowl with squash.

Put 1 Tb butter in a saucepan over medium-low heat. Add ¾ C pine nuts, stir until golden brown, about 5-8 minutes.  Watch carefully because pine nuts burn quickly. Add to bowl with preserved lemon. Using the same pan, melt 2 Tb butter over medium heat.  Add 1¾ C Israeli couscous, 1 3-inch cinnamon stick and 1 Bay leaf and stir until couscous browns slightly, stirring often, about 3 minutes. Add 2 C vegetable or chicken broth and 1 tsp salt – bring mixture to a boil. Lower heat, cover, and simmer slowly about 10 minutes until the couscous is tender and liquid is absorbed. Drain; remove cinnamon stick and bay leaf. Do not rinse the couscous.
Cooked Israeli couscous
Add couscous to vegetables and toss with 2 Tb olive oil to coat. Add preserved lemon peel, ¾ C chopped parsley, pine nuts, ½ C golden raisins, ¼ tsp ground cinnamon and salt to taste. For additional sweetness and color, you could add ¼ C dried cherries or cranberries.

Toss to mix well.  Just before serving, sprinkle with final 1 Tb of olive oil over top of dish. Serve to accolades!  This would work well as a vegetarian entrée or a side dish. It can be made a day in advance – add additional olive oil as needed to keep it moist.
Ready to serve!
We enjoyed this with a wonderful dry German Riesling – but any dry white wine would work.  Bon Appetit!

Larue

Preserved Lemons
Preserved lemons

My favorite lemons to preserve are the thinner-skinned, sweeter Meyer lemons, but Eureka lemons work equally well. To make them, all that is required is lemons and salt. Additive free kosher salt is especially recommended, as it seems to dissolve more quickly. They are terrific in so many dishes – you will want to make your own to use again and again.

Wash the lemons well. While holding them over a plate to catch the juice, make four deep longitudinal cuts, evenly spaced around the lemon, effectively dividing it into four sections attached at the ends. You want to keep the lemons whole. Pack the cuts generously with salt. Put a couple of tablespoons of salt in the bottom of a clean, sterilized mason jar and pack lemons in layers, sprinkling a thin layer of salt between layers of lemons. Push the lemons down firmly to pack them tightly and to help express some of their juice. To enhance the Mediterranean flavors, feel free to add a cinnamon stick, whole black peppercorns, cloves, coriander seeds and a bay leaf to your jar as you build it with the lemons. Finish with a final layer of salt. You almost cannot use too much.

Pour any juices that collected on the plate when the lemons were cut. Cover the jar tightly. Leave at room temperature in a dark corner, monitoring the level of liquid in the jar. The lemons should be completely submerged in juice after a few days.  If they are not, add more lemon juice. Ideally, you should wait one month, shaking the jar daily, before they are truly preserved. But, if needed, they are likely ready in a few weeks and will keep for up to a year.  They do not absolutely require refrigeration, but I always keep them tucked in the corner of our frig. Use wooden utensils when removing lemons later for use. As the metal in the Mason jar will become eroded by salt, I would recommend covering the top with saran wrap after first use, before replacing the lids so it can be more easily opened later.
Perserved lemons in a mason jar
Preserved lemons are featured prominently in Jewish, Mediterranean and Italian cooking.  They are used in drinks (lemon drop martini & lemonade, of course), salads (cut up a little and add for summery lemon bite in winter!), sauces, or on fish, chicken, lamb, beans, lentils or any vegetable. Of course, any lemon dessert would only be enhanced with their use.

The lemons should be rinsed well before use – people use the rind most frequently, cutting off the pulp. How does the rind taste? – more lemony, perhaps a bit salty but not at all acidic. (Pulp is fine for use but is quite a bit saltier - in a Bloody Mary maybe?)  As the lemons age, the color intensifies, turning almost a deep amber. 

Other ideas: finely dice preserved lemons and mix them with sautéed vegetables, such as green beans, fava beans, or to elevate lowly rounds of carrots into something interesting and exotic, perhaps tossing in a few cumin seeds as well. They are also good mashed into butter with some fresh herbs, then smeared on top of grilled fish or a nice chunk of caramelized roasted winter squash. You could sneak some into a batch of tapenade, as well as adding some finely chopped little pieces to a batch of lemon ice cream, too! Preserved lemons are more flexible than you might think. A few other ideas, some more traditional than others - all highly recommended: thin-crust wood fire oven pizzas (as a garnish/topping), in various slow-cooked tagines, in couscous and a few other whole grain salads, and as an accent in a tomato based panzanella.
Any place you would use salt and lemon flavor is fair game – just expect it to be better! If my house were on fire, I’d grab my jar of preserved lemons on my way out.  They are that great – and so much better homemade. Give it a try!

Tuesday, September 18, 2012

Brined Pork Chops with Fennel Pollen


For comments, please post below or email to cookingwithlarue@gmail.com

Brined Pork Chops with Fennel Pollen

Serves: 4
Brined Pork Chops with Fennel Pollen 
Pork is the “other white meat”. The advertising slogan worked well and many people increased their pork consumption. Despite the slogan, the U. S. Department of Agriculture, (USDA), treats pork as a red meat. However, it is quite a bit leaner than similar cuts of beef. The most common cuts of pork have 16% less total fat and 27% less saturated fat than 20 years ago. Today’s leaner pork can be enjoyed medium rare. The USDA recently announced that pork could be safely cooked to 145 degree F followed by a three-minute rest time, resulting in juicy and tender pork. As an added plus, pork is relatively inexpensive, very tender and very flavorful.

This is definitely a plan ahead recipe as the brine last three days. Yes, I said 3 days! I did not believe it mattered at first so tried it after one day vs. three days. It was a huge difference in the depth of flavor imbued into the pork. It takes no extra cooking or prep time. One just needs to set it up three days before cooking and serving.

Brining is a powerful tool. It cures meats, as well as change their texture, flavor and juiciness. It also allows you to season meat uniformly. Gone are the days of dry pork! It absorbs flavors well and, because of the nature of the osmotic effect of salt, the meat actually retains more moisture after cooking. I ALWAYS brine pork and chicken….always, always. So spend the extra few minutes to create your brine and you will be amply rewarded with an amazing moist and tasty pork chop.

From a technique standpoint, the one critical thing to remember is that the brine needs to be completely chilled before you add the meat. Therefore, it is a good idea to make your brine the day before you’ll need it. Brine times are important and vary with cut and type of meat – so stick to them – but keep in mind that the brined food does not have to be cooked immediately. Once brined, it can be removed and refrigerated for a day before being cooked. Finally, discard the brine after its use – never reuse it.
  • 4 bone-in 1-inch thick pork rib chops
  • 1½ Tb wild fennel pollen*

For the brine:
  • ½ C salt
  • 1/3 C sugar
  • 2 Tb fennel seed
  • 2 Tb coriander seed
  • 1 tsp crushed red pepper flakes
  • 4 dried bay leaves
  • 1 medium onion diced
  • 2 carrots, peeled and diced
  • 2 ribs celery with their leaves, diced
  • 5 cloves garlic smashed
  • 1½ Qtrs. cold water

To make the brine: In a large pot add all ingredients and stir to combine. Heat to boiling for 2 minutes just to dissolve the sugar and salt. Remove from stove and refrigerate until cool or chill overnight. Then submerge 4 bone-in 1-inch pork rib chops in the brine and refrigerate for 3 days. After 3 days remove the chops from the brine; discarding brine.
Brine ingredients
Pork chops swimming in brine
Preheat your grill or grill pan. Roll the fat edge of each pork chop with the fennel pollen. 
Role edge of the chop in the fennel pollen
Dusted with fennel pollen
Place pork chops gently on the preheated grill. After 4 minutes rotate the chops 90 degrees to create lovely grill marks. Grill the chops for another 4 minutes and then turn over and repeat the process. If the chops seem to be burning move them to a cooler part of the grill to allow for a longer cooking time without burning. Stand the chops up so the fat edge is in contact with the grill to crisp up the fat edge, this will also make the fennel pollen very aromatic. Remove the chops from the grill and let rest in a warm place 5 minutes before serving. Pork is done at 140-145 degree F.
On the grill
Grilling the edge (not publisher's hands again!!)
Lined up on the grill
This is wonderful on its own or served with polenta, buttered noodles or vegetables. I served it recently with grilled corn on the cob and sautéed fresh lima beans. A California Pinot Noir is the quintessential wine. Other choices would be a fruity Zinfandel, Syrah or Merlot. If white wines are your preference, serve with a California Chardonnay. In any case, please give this a try. Do not be intimidated by the three-day brine, as you will be rewarded with amazing flavor.

Bon Appetit!

Larue

* If fennel pollen is not available, toasted ground fennel seeds are an acceptable alternative. But, I use fennel pollen on so many things; it might be worth obtaining some. See: http://www.pollenranch.com